Well, start and re-start again and never give up. No matter how many times it is required. So although latest effort didn’t create momentum, here I am again.
It is very interesting because I have unpleasant memories from last time I tried to attempt pset4. It was heavy, boring to some extent and a bit confusing. This has delayed a bit the time that it took me to get back to work! And why I say it is interesting, is because today, I am somehow more relaxed, rested, and I see everything in a different light. The problem is fun. and things make more sense to me.
I am listening to this music while I work: https://www.youtube.com/watch?v=_D4gqb_yTuE
Continuing with pset4 of CS50.
Refreshing bits, bytes, hexa, BMP etc…
Well, I have done this already several times but once one stops working on these, it is very easy to forget. So it took me some time to again go back to it, and it is now very clear to me. 1 byte is 8 bits. And a 24 bit color BMP image basically consists of some headers followed by the pixels… (in a 24 bit color file, pixels come from byte 55 included and onwards). The pixels are made out of 6 hexa characters, so 24 bits each so 3 bytes each. The first 8 bits tell us how much red in the image, the next how much green, the next how much blue (Although BMP file arranges these backwards BGR). This means there are 255 levels for each one of the colors… which makes sense! So pure red can be described as: 255,0,0 or the same 0xff0000, which on a BMP file it would be stored as 0,0,255 which is 0x0000ff.
Using xxd for manipulating files (hex editor)
At the end of the day the file is just a bunch of 0s and 1s. However I would like to be able to manipulate these in a way that makes life easier for me. This is why we use hex editor. This allows us to divide the file in simpler structure using hex. For example reading one of the .bmp files I was given in exercise can be done with the following command:
xxd -c 24 -g 3 -s 54 smiley.bmp
And every argument of course means something. xxd is the editor, -c 24 basically tells the program that I want 24 “octets” displaying on a line. This means 24 Bytes, or 24 pairs of hexa letters like “ff” (in this case makes sense as our image is 24 byte wide (or 8 pixels wide, as 1 pixel we said is 3 byte). The -g 3 is telling the program to space each group of X bytes with a space character. In this case as we are interested on the 3 byte groups (Each 3 bytes is 1 pixel), then -s 54 is telling the program to display starting from after byte 54. This is because BMP 24 bit color file has 54 bytes of header, and the actual image only appears after that :).
Interesting that, pixels are, remember 3 bytes, this means for example ff00ff. Now, it is very important that each line of the picture has a n of bytes that is a multiple of 4. This means that for example if I have a 3 pix line , this is 9 bytes, which is not a multiple of four. What the file does in this case, is it calculates how many bytes are left to reach that multiple of 4 value, and it adds 00’s to those. So depending on length, 0-3 bytes of padding need to be added at the end of scan line. In the case above, we need 3 bytes to reach 12 total bytes… so 000000 is added as padding.
Headers on BMP file
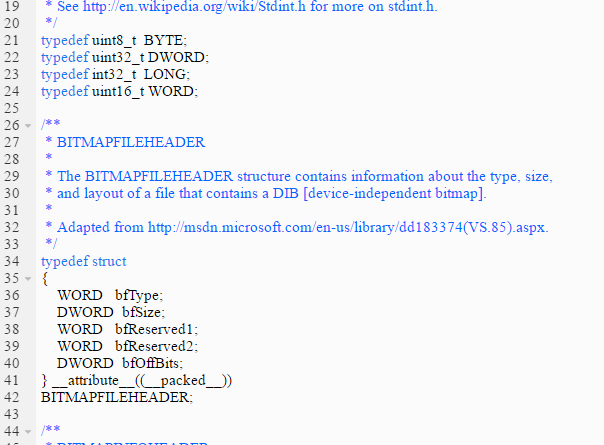
Again this is something that seemed quite daunting first time I read it. Now it makes suddenly a lot of sense and I am enjoying it. For example the image below… makes total sense now. They are just creating some “synonims” for some types like unisgned 8 bit integer etc… and adapting them to some types that are used in Windows. Then, the header is also established, in a very clear manner. Bitmapfileheader is constructed by 1 word followed by 1 dword, followed by 2 words etc… and each of these components has its own name as it describes a particular feature. As already explained, this header has 14 bytes or 112 bits which is the same. Once you add the number of bits each one of those types takes, you will see that the size of the header is, indeed 14 bytes.
Solving the first part of the problem.
Basically we are given this image, and we need to find whats really behind.
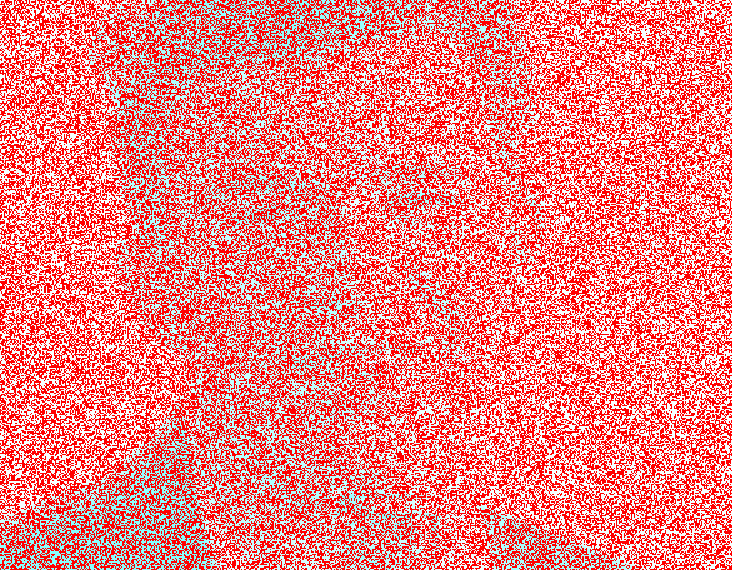
Obviously you can already see what’s behind, but the point is, can we make it more clear?
It is great because by doing all the provided reading and answering the given questions one really gets to learn the insides of an image, and what they really are hence you can solve the problem. What I thought was… obviously you have a lot of pixels that are fully red. What if we turn these into white? Will this help us? Now, the extremely interesting thing is that once I wrote the code, I got a result that looked PRETTY good, much much better than I thought.

What is going on?
Most people would have stopped here and would have said “Problem Solved”… but something is not making sense to me. Supposedly red pixels had to be fully replaced by white pixels. In the image we got, I can’t really see fully white pixels!!! So what’s the problem? Well, turns out I made a mistake on my code that ended up giving me a WAY better result than I would have ever gotten otherwise.
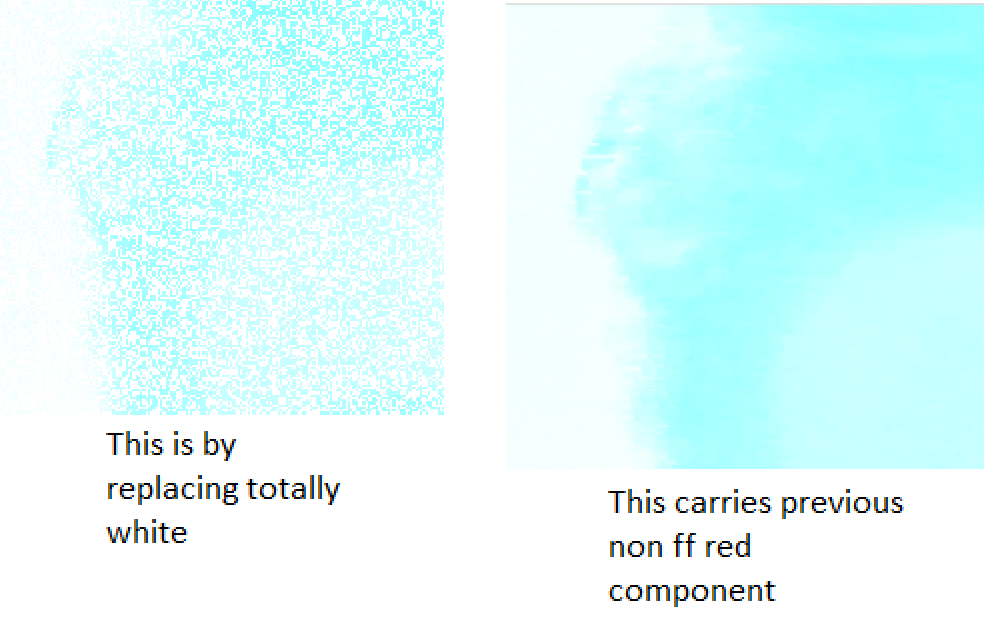
I found that the “error”was that instead of replacing a fully red cell – 0000ff, for a totally white like ffffff… I was actually replacing it by ffffXX, where XX is the last non “ff” found value for the red component.
So how does the image actually look when you replace with full ffffff? Well after “fixing the code” I managed to make it work, and it looks like this:

Clearly worse. So again… many lessons learned from this exercise… sometimes “bugs” lead you to very interesting and better results than planned. Also this reinforces what we already know… that is very important to go deep into what one is doing and to understand why things are happening… only then we can fully realize our potential.
More on pset4 coming… it’s by no means over.


